In cPanel, an addon domain refers to a feature that allows you to host additional domain names within the same hosting account. This means you can manage multiple websites from a single cPanel account.
Each add-on domain is treated as a separate entity with its own website content, email accounts, and other configurations.
You can use virtually any domain as an addon, but the domain must be registered in order to be accessed from the web. For example, you could create addondomain.com as an addon domain. However, only domains you have registered will work on the web.
At the creation of an addon domain, the cPanel system generates a subdomain.
For example, if your primary domain is example.com and you create abcd123.com as an addon domain, there will be a subdomain titled abcd123.example.com.
Do not delete or alter the contents of this subdomain; it is required for the proper function of the addon domain.
Table of Contents
Overview of how addon domains work in cPanel
Primary Domain: When you sign up for a hosting account, you typically have a primary domain associated with that account. This is the main domain for your hosting account.
Add-On Domains: You can use the add-on domain feature to add extra domains (websites) to your hosting account. These additional domains can have their own content, email accounts, databases, etc.
Subdomains: Along with add-on domains, cPanel also allows you to create subdomains under your primary domain. Subdomains are like extensions of your primary domain (e.g., blog.yourdomain.com).
Separate Directories: Each add-on domain is associated with its own directory within the file structure of your hosting account. This helps keep the content of each website separate and organized.
Email Accounts: You can create email accounts associated with each add-on domain. For example, if you have an add-on domain “example2.com,” you can create email addresses like info@example2.com.
FTP Accounts: You can set up separate FTP (File Transfer Protocol) accounts for each add-on domain, allowing you to manage the files for each domain independently.
Steps to create Add-on domain in cPanel
Creating an add-on domain in cPanel involves a few straightforward steps. Here’s a step-by-step guide:
Log in to cPanel:
Open your web browser and enter your cPanel URL (usually http://yourdomain.com/cpanel).
Log in using your cPanel username and password.
Locate the “Addon Domains” option:
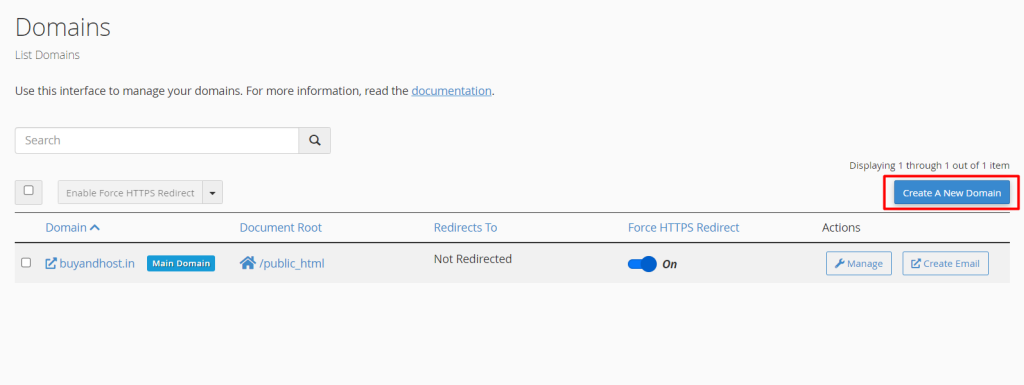
Once logged in, navigate to the “Domains” section in cPanel.

Look for the “Create a New domain” icon or link. It’s typically represented by a globe or labeled directly as “Addon Domains.”
Enter Addon Domain Details:
In the “Addon Domains” section, you’ll find a form to add a new domain. Fill in the following details:
New Domain Name: Enter the domain you want to add (e.g., example2.com).
Subdomain/FTP Username: This field is automatically filled based on your new domain. You can change it if needed.
Document Root: This is the directory where the files for the new domain will be stored. It’s usually filled automatically based on the new domain but can be adjusted if necessary.
Password: Enter a password for the FTP account associated with the add-on domain.
Password (Again): Re-enter the password to confirm.
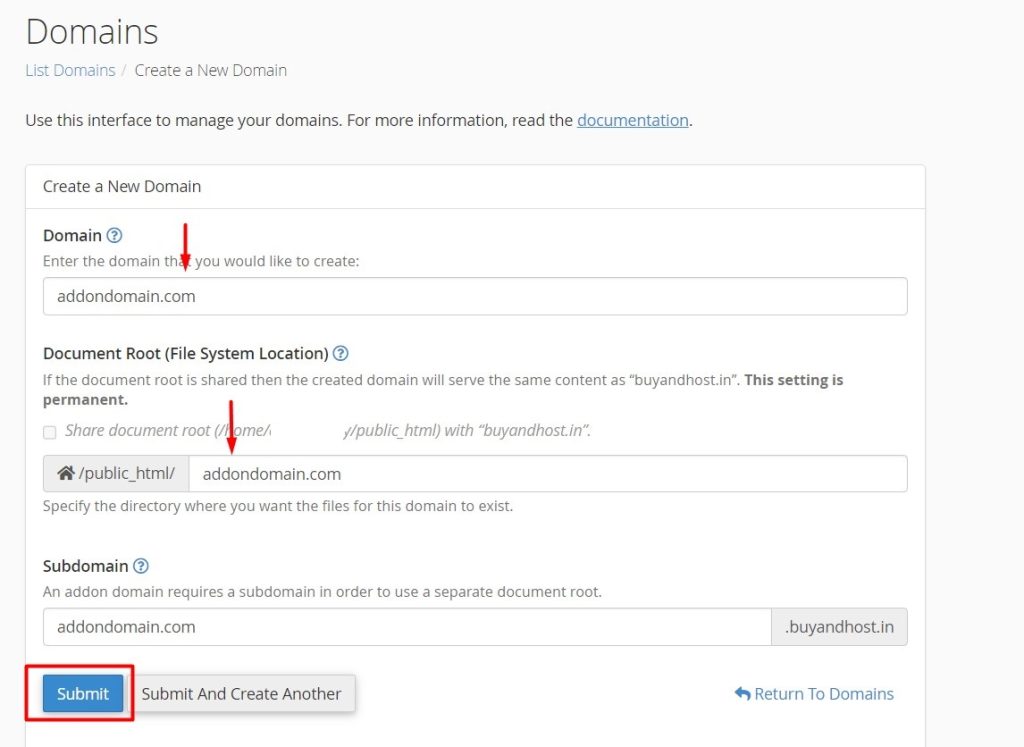
Click “Add Domain”:
Once you’ve filled in the details, click the “Add Domain” button.
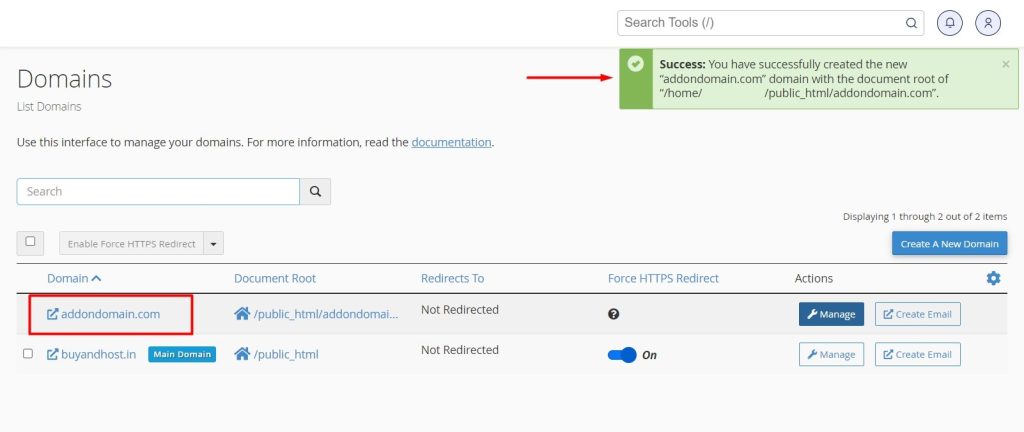
Confirmation:
cPanel will display a confirmation message indicating that the add-on domain has been created.
Verify DNS Configuration:
Ensure that you have updated the DNS settings for the new domain to point to your hosting provider. This involves setting the domain’s nameservers to those provided by your hosting provider.
After following these steps, your new domain is set up as an add-on domain in cPanel. You can manage its files, create email accounts, and perform other tasks through the same cPanel interface. Keep in mind that DNS changes may take some time to propagate across the internet, so your new domain may not be immediately accessible.


